This blog post has been refreshed to reflect Cloudinary product updates.
To upload a video to Cloudinary, use the Upload Widget for a ready-made browser interface, the Upload API for application-controlled uploads, the Console Media Library for manual uploads, or the Media Library widget inside an editorial application. Programmatic uploads should specify resource_type: "video"; files larger than 100 MB need a chunked upload method, within your account’s limits. Cloudinary upload guidance.
The right choice depends on who’s uploading. A customer submitting a product video needs a different workflow from an editor choosing an approved clip. This guide compares those paths, shows JavaScript and Node.js examples, and explains how to check that a stored video is ready for its intended use.
Use the Upload Widget for public-facing file selection, and the Media Library widget for authenticated editorial asset selection. Use the API when you need control over the interface or server workflow.
The first two methods suit user-generated content. The last two are team workflows. The comparison combines Cloudinary’s client-side upload options, Media Library developer guide, and Media Library widget documentation.
You’ll need a Cloudinary product environment and a video you’re allowed to upload. For the Node.js examples, use a supported Node.js release and the current cloudinary package.
Find your cloud name, API key, and API secret under Settings > API Keys. The cloud name identifies the product environment. Keep the API secret on the server, never in HTML, browser JavaScript, a client-exposed environment variable, or source control. Cloudinary recommends upgrading its Node.js SDK to receive current security improvements.
Before testing, check the environment’s upload limits and available storage, transformation, and delivery usage. The examples don’t require an AI add-on or beta feature, but they do consume account resources. The Media Library widget has separate user-seat requirements; Enterprise customers also need an Assets plan. Plan comparison, widget requirements.
The Upload Widget provides file selection, progress, and upload events without making your application relay the video bytes. It can be embedded with JavaScript independently of a frontend framework. Upload Widget guide.
For an initial test, create an unsigned upload preset under Settings > Upload > Upload Presets. Name it video_demo_unsigned, choose Unsigned, and restrict allowed_formats to mp4, mov, and webm. Keep the preset limited to the behavior you intend to expose. An unsigned preset name is public configuration, not a password. Upload preset configuration.
Add a button, a status message, and the current Widget loader:
Place this JavaScript after that markup, replacing the cloud-name placeholder:
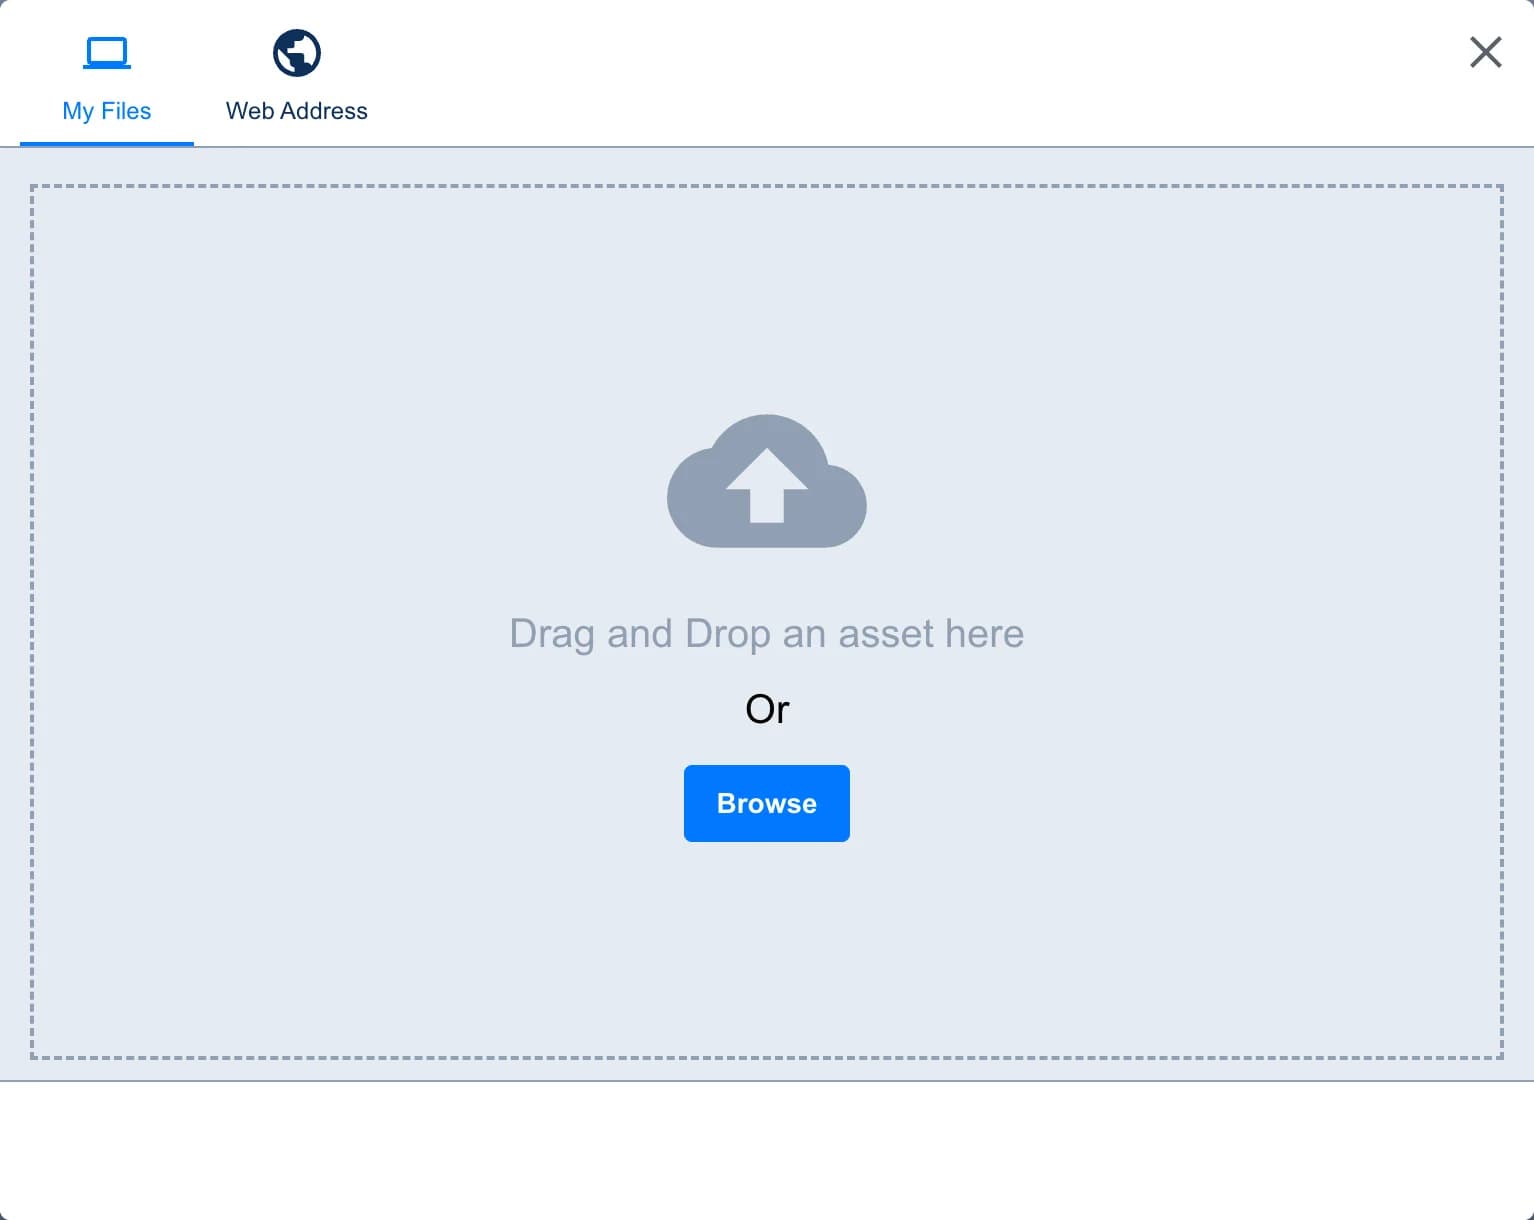
My Files opens local file selection. This capture shows the empty selection state, before an upload.
The 50 MB value is this example’s browser limit, not a Cloudinary plan allowance. maxVideoFileSize and clientAllowedFormats apply to local-file validation. A remote URL isn’t covered by those local checks, and a caller can bypass your page. Cloudinary upload presets do not provide a per-preset byte-size cap. Enforce application policy with trusted validation, account controls, and server-side verification. Widget client-side parameters, preset security considerations.
Web Address accepts a reachable file URL. The placeholder isn’t a submitted URL.
For a starting project, see Cloudinary’s JavaScript Upload Widget sample on GitHub. Configure sources explicitly rather than assuming every external service is available in every integration.
A signed direct upload lets the browser send video bytes to Cloudinary while your backend controls the signed parameters. The backend authenticates the user, authorizes the request, chooses permitted options, and generates the signature. The browser receives the signature, timestamp, API key, and upload parameters, but never the API secret. Authentication signatures.
!Note: Don’t expose an endpoint that signs arbitrary client-supplied options. For example, your server can choose a unique public ID, disable overwriting, and restrict formats before issuing the signature.
A signature isn’t a one-use upload ticket. Cloudinary upload signatures remain valid for one hour, and file and resource_type are excluded from the signed string. Signing doesn’t authenticate the actual bytes or independently enforce a video-only policy. Check the stored asset before associating it with application content. Signature rules.
Upload authentication and playback privacy are separate. By default, assets using the upload delivery type are publicly accessible; signing the upload does not change that. For sensitive videos, select a suitable delivery restriction before uploading. Cloudinary media access methods.
The Node.js SDK is useful when your backend already has the video, such as a controlled import or processing job. It handles upload authentication from server-side configuration.
Install the package:
Create a server-only .env file, replace these placeholders, and exclude the file from version control:
Save the configuration as cloudinary.mjs:
Then save upload-video.mjs. This command-line example accepts a trusted local file path and applies its own 50 MB limit before uploading:
Run it with your own test file:
Set resource_type: "video" explicitly because common SDK upload methods otherwise default to images. The REST equivalent uses the video/upload endpoint; you can call it directly when building a custom client. Video upload parameters, Upload API reference.
The public-ID prefix above does not mean the same thing as a Media Library folder in every environment. In fixed folder mode it determines the folder path. In dynamic folder mode, use asset_folder for library organization; the public ID remains separate. Folder modes.
For a public-facing app, consider a signed browser-to-Cloudinary upload rather than passing large request bodies through your web server. If your server accepts file streams, use the SDK’s streaming methods instead of reading entire videos into memory.
Use a chunked method for videos above 100 MB, subject to your account’s maximum video size. A smaller chunk size does not increase that allowance. Cloudinary’s Node.js chunked methods default to 20 MB chunks and support sizes down to 5 MB. Node.js upload methods.
With the server configuration above, a chunked local-file upload can use this callback-to-Promise wrapper:
The chunked protocol returns intermediate responses with done: false; final completion includes done: true. Make sure not to treat an accepted chunk as a completed asset. Also, upload_large defaults to raw, and its local-file form returns a stream, not the Promise returned for a remote URL. Choose the method and completion handling deliberately. Chunked upload behavior.
Chunking improves tolerance for interrupted transfers. It does not, by itself, implement restoring an upload after a browser reload or restarting your application.
Use the Console when an authorized team member needs to add a video without integrating an upload interface.
Open Assets > Media Library, select the intended destination under Folders, and choose Upload. Use My Files to select a video, or drag the file into the dialog. Configure any available Advanced options before choosing files. The current folder controls the upload destination; Console upload defaults can differ from those used by your API. Media Library uploading.
The Assets view is filtered to an existing sample video. To choose an upload destination, use Folders before starting a new upload.
The Console’s Upload dialog, before selecting a file. Available sources depend on the integration and configuration.
You can also watch the five-second upload-source demo below. It shows switching from My Files to Web Address. No file or URL is submitted, and the edited duration is not an upload-speed measurement.
The Media Library widget lets an editor browse Cloudinary assets without leaving a content management system (CMS). It can also expose upload capabilities permitted by that user’s role. Unlike the Upload Widget, it is an authenticated asset-management interface, not a public customer uploader. Each user needs a Cloudinary seat; Enterprise customers require an Assets plan. Media Library widget requirements.
This example creates an asset-selection button and handles one selected video:
The cloud name selects the environment. An API key is optional here, and supplying it does not replace the user’s login or permissions. Never embed the API secret. Organizations using Security Assertion Markup Language (SAML) single sign-on should check the documented setup and browser-cookie requirements. Widget configuration, login requirements.
The selection callback updates the interface; it is not a publication permission check. Your backend should verify the selected asset and the editor’s application permissions before saving it to a record.
Treat successful transfer, completed processing, and permission to publish as different checks. A browser callback is useful feedback, but application persistence needs trusted evidence.
For the server upload example, append an Admin API readback using the returned immutable asset ID:
An asset_id remains stable even if an asset’s public ID changes. Readback lets you check actual format, byte size, duration, and other stored properties. Keep this call server-side and budget for Admin API rate limits. For browser uploads, additionally check your expected namespace, ingestion record, and ownership before linking the asset to content. Read an asset by asset ID, Admin API usage limits.
Use the response appropriate to the operation:
For async: true, supply notification_url. For asynchronous eager outputs, use eager_notification_url. Validate notification signatures and timestamps against the original request body before changing application state, and make repeated completion events safe to handle. Asynchronous uploads, eager transformations, notification verification.
Uploading an MOV file does not mean every browser can play its original encoding. Choose a delivery format or streaming workflow suitable for your audience, then test the actual output. A transformed copy is a derivative, not a replacement for the stored original unless you explicitly apply an incoming transformation. Video delivery best practices.
Cloudinary Video Player supports features including captions and adaptive bitrate streaming. For longer content, evaluate a streaming workflow rather than assuming one original-file URL is the right playback experience. Check the required transformations, accessibility, and delivery behavior separately. Cloudinary Video Player, adaptive bitrate streaming.
Use the failure stage to choose the fix. Repeating an upload cannot solve an incorrect access policy or a derivative that is still processing.
The examples teach upload mechanics, not a complete public-upload service. Before accepting public traffic, add application authentication where needed, quotas, abuse controls, bounded concurrency, retention rules, and cleanup for rejected assets. Do not assume that accepting a format establishes content safety, licensing rights, or publish approval. See Cloudinary’s upload troubleshooting guidance for service-specific errors.
Choose the upload path around the person and system doing the work: the Upload Widget for customers, the API for application-controlled operations, the Console for manual team uploads, and the Media Library widget for editors inside a CMS.
Then verify the stored asset, wait for required processing, and test the intended delivery output. That separation gives you a workflow you can explain and troubleshoot, rather than a file picker that reports success before the application is ready to use the video.
Ready to start building better visual media experiences? Sign up for a free Cloudinary account today.