Introduction
A policyholder is standing at the roadside next to a scuffed bumper. They have a phone, decent lighting, and five minutes. They take pictures of the damage, send them in, and then the process hands them a wait. Three waits, actually.
The photos go into a queue to be reviewed by hand. If the damage looks unclear, an inspection gets booked, and somewhere in the middle, somebody promises a callback. None of those waits benefit anyone, nor are they strictly necessary. They exist because the first real decision in the claim (is this minor or is this serious?) happens after a human opens the claims file. Every next step queues behind that one judgment.
Introducing a decision model into the process changes where that first human intervention is needed and might just save a lot of headaches for everyone involved.
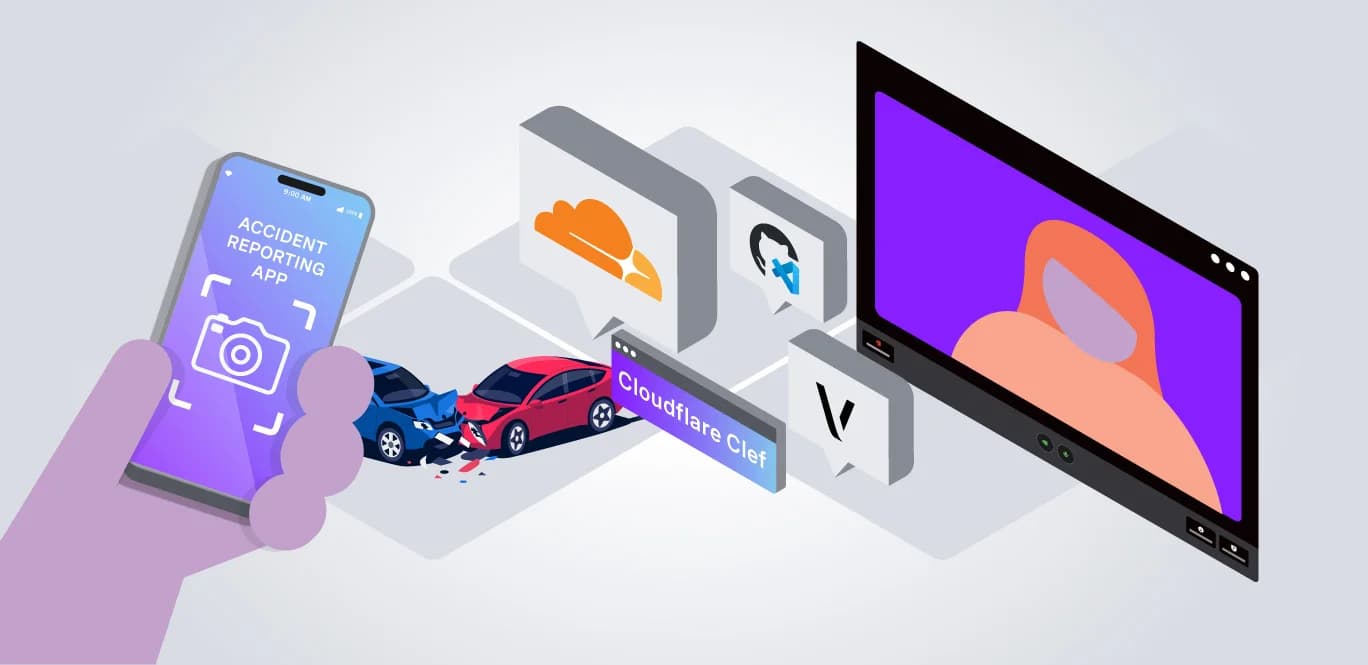
In this article, we’ll explore speeding up the process by handing off the first decision to a decision model and only pulling in a human operator when needed. We’ll build a vehicle accident claims app that has the user take photos of the damage, sends them to Cloudflare’s Clef model, gets back typed answers, and uses them to route the claim automatically. The clearly cosmetic cases auto-approve, the severe ones open a live Vonage Video API call with an adjuster.
TLDR; Fork the repo and try it yourself on GitHub
What Is a Decision Model?
Cloudflare describes it in one sentence: “A decision model makes classifications to help agents decide how to act, based on certain probabilities. [...] A decision model will return typed answers with probabilities (outputs), which your code can use to route the ticket, trigger an escalation, or defer to a human.” (Cloudflare, Introducing Clef, 2026)
The concept comes from TypeSafe AI’s Jev model, which Cloudflare credits as the first implementation of this approach. Rather than generating text and asking your code to parse the response, Jev introduced the idea of asking typed questions with constrained answer shapes and getting structured, machine-readable answers with probabilities attached. Clef is Cloudflare’s version: a 27B multimodal model running on Workers AI, with open weights under Apache 2.0, that reads text, JSON, images, or video, and returns a probability for every option you define (Cloudflare Workers AI docs).
The contrast with an LLM is worth making explicit, because it explains why this pattern fits a claims routing problem.
The Three Question Types
You get three question types (Cloudflare Workers AI docs):
Type
Returns
Example from this app
noul
A probability (0–1) for a yes/no question; 0 = no, 1 = yes
airbags_deployed, requires_tow
choice
The most likely option from a fixed set, with per-option probabilities
severity with options minor_cosmetic, moderate_drivable, severe_total_loss, none
score
A probability-weighted numeric score along an ordered list of criteria
Not used in this app, but the natural next thing to try for a continuous severity scale
If you read the Jev tutorial, you’ve already seen these three question types in action. The question names, the wording of instructions, and the criteria labels are all yours; the shape of the answers stays the same.
Decision Model vs. LLM: When to Use Each
Decision model (Clef)
LLM
Output shape
Typed answer with probability
Free text
How it’s produced
One scoring pass over the allowed options
Token-by-token generation
What you do with it
Compare to a threshold
Parse a string
Better for
Routing, classification, triage
Writing, reasoning, tool calls
A routing decision for a claim needs the left column. “Is this severe?” wants a label and confidence level your code can compare against a number, not a sentence to parse.
Clef doesn’t approve a claim. The decision stays in your code, where you can read it, change it, and explain it to a regulator. Keep that separation intact, especially on decisions that affect someone’s coverage.
What We’re Building
This app is a first notice of loss (FNOL) flow: the step where a policyholder reports a loss and the claim either resolves or escalates. FNOL is the front door of every claim, and the speed of that first judgment determines how long everything else takes.
The app has three pieces:
- Customer page (public/start-claim.html, public/start-claim.js): a mobile-first interface that opens the camera and captures four corner photos of the vehicle.
Customer page (public/start-claim.html, public/start-claim.js): a mobile-first interface that opens the camera and captures four corner photos of the vehicle.
- Server and decision engine (server.js): makes one Clef request with all four images, applies thresholds to Clef’s answers, and signals the adjuster dashboard if escalation is needed.
Server and decision engine (server.js): makes one Clef request with all four images, applies thresholds to Clef’s answers, and signals the adjuster dashboard if escalation is needed.
- Adjuster dashboard (public/dashboard.html, public/dashboard.js): listens for escalation signals and joins the live video call.
Adjuster dashboard (public/dashboard.html, public/dashboard.js): listens for escalation signals and joins the live video call.
One claim moves through them in six steps:
- The claimant starts an inspection on their phone.
The claimant starts an inspection on their phone.
- They photograph four corners of the vehicle.
They photograph four corners of the vehicle.
- The server sends one Clef request containing all four photos alongside eight questions clarifying the level of damage.
The server sends one Clef request containing all four photos alongside eight questions clarifying the level of damage.
- Clef returns typed answers to the eight questions. The decision engine resolves them to one of three outcomes: approved, no_damage, or escalate.
Clef returns typed answers to the eight questions. The decision engine resolves them to one of three outcomes: approved, no_damage, or escalate.
- On an escalation, the server signals the adjuster dashboard using the Vonage Video API.
On an escalation, the server signals the adjuster dashboard using the Vonage Video API.
- An adjuster accepts and joins a live video call with the claimant.
An adjuster accepts and joins a live video call with the claimant.
The claim moves from the customer's phone through Cloudflare Clef and the Express server to the adjuster's dashboard, with live video opening only on escalation.
Prerequisites
- Node.js 22+
22+
- A GitHub account
A account
- A Cloudflare account - account ID and an API token with Workers AI access
A Cloudflare account - account ID and an API token with Workers AI access
Get the App Running
Fork the Repo and Run the Setup
- Fork the repo to your GitHub account.
Fork the repo to your GitHub account.
- Click Code → Codespaces → Create codespace on main.
Click Code → Codespaces → Create codespace on main.
The devcontainer starts a Node environment, runs npm install, makes port 3000 public, then runs node setup.js and npm start automatically.
The setup script asks for five values:
- Vonage API key
Vonage API key
- Vonage API secret
Vonage API secret
- Cloudflare account ID
Cloudflare account ID
- Cloudflare auth token
Cloudflare auth token
- An application name (for your Vonage application)
An application name (for your Vonage application)
It creates a Video-enabled Vonage application, saves the private key, and writes a .env file:
If the terminal doesn’t show a clickable link once the server starts, open the Ports tab and use the URL under Forwarded Address. This opens the demo page featuring a QR code that you can scan with your mobile device to get started, and a set of test images picturing vehicles with different levels of damage (in case you don’t have a car handy). Click through the Open Agent Dashboard link and keep an eye on the agent dashboard in a separate browser tab.
You'll have three tabs open at this point:
The CodespaceThe Demo PageThe Agent Dashboard
Try the Sample Test Photos
The home page includes three sample scenarios, each with four pre-made corner images you can photograph to trigger a specific outcome:
- Minor Damage → returns approved
Minor Damage → returns approved
- Total Loss → returns escalate
Total Loss → returns escalate
- No Decision (AI Unable to Determine Damage) → may return either, depending on model confidence
No Decision (AI Unable to Determine Damage) → may return either, depending on model confidence
After scanning the QR code with your phone, pick a scenario, then take the four corner pictures in the same way a real claimant would photograph the car. Once you hit Submit, you’ll be presented with either a resolution or a prompt to connect to a live agent.
Claim Process Demonstrated for the Minor Damage Scenario
Build the Customer Page
Before the first photo is taken, a Vonage Video session is already created on the server for this claim, returning an application ID, a session ID and a publisher token:
The camera on the customer page is a Vonage Video publisher initialized with OT.initPublisher instead of plain getUserMedia. That’s deliberate: we reuse the same publisher object that captures photos during the inspection to carry the live video call later if the claim escalates. One camera does two jobs, without re-initialization or a second permission prompt.
publisher.getImgData() returns a base64 PNG from the live camera feed. The page wraps it as a data URI and stores up to four images, one per corner.
Using the live feed rather than a gallery picker is a first line of defense against submitting stock photos or old camera-roll images. It won’t stop a determined attempt (as demonstrated by the use of test photos in this app), but it trips up a lazy one.
Ask Clef for AI Car Damage Detection
Note: All parameters and values below are for demonstrative purposes only; replace or tailor them to fit your specific use case and needs. See the Clef docs for more details on parameters.
First, we build the request object:
We are passing Clef a state (the context to evaluate), images (array of pictures submitted by the user), and a set of questions we’d like answered (one of type choice and seven of type noul in this case).
For each question, we need to define its type (choice, score or noul), instructions (the question itself in plain English), and a criteria object in the case of choice type questions (listing the set of options). The criteria labels become the keys in the response object, so choose names that work as code identifiers.
Next, the API call itself:
Answers arrive under result.answers, keyed by the question names you sent. The choice question gives you evaluation.severity.choice as a string, while each noul question gives you evaluation.<question>.noul as a float between 0 and 1.
One request returns eight answers, and there’s no paragraph to parse.
The Decision Engine: Three Outcomes for Every Claim
The server takes Clef’s eight answers and applies two threshold checks.
The first check identifies damaged zones for the message shown to the claimant:
The second check decides whether the claim escalates:
Parameters
Threshold
What it controls
damage_front, damage_rear, damage_side, glass_shattered
> 0.7
Which zones appear in the claimant’s message
airbags_deployed, flat_tires, requires_tow
> 0.5
Whether the claim escalates to a person
severity === "severe_total_loss"
true
Whether the claim escalates to a person
Note: The 0.5 and 0.7 values are demo thresholds. They were chosen to make the sample scenarios work reliably, not because they are correct for a production claim. Third-party analysis of Clef advises retuning thresholds on labelled data specific to your domain, and notes that no public image benchmark for Clef exists yet (ntorres.dev, Clef (Cloudflare) explained).
Note: The 0.5 and 0.7 values are demo thresholds. They were chosen to make the sample scenarios work reliably, not because they are correct for a production claim. Third-party analysis of Clef advises retuning thresholds on labelled data specific to your domain, and notes that no public image benchmark for Clef exists yet ().
So, the zone list is cosmetic, and the escalation list is consequential. Note what that means for glass: shattered glass gets named in the message but never escalates on its own. If you want it to, it belongs in the isSevere check too.
From here, we have three branches:
- escalate
escalate
- no_damage when damagedParts is empty and severity is none
no_damage when damagedParts is empty and severity is none
- approved for everything else
approved for everything else
Each one has its own screen. Approved shows Claim Auto-Approved. No damage shows No Damage Detected. Escalate shows a Severe Damage Detected dialog with two choices for the claimant: Connect to Live Adjuster, or I'll Wait for Email.
The model measures, your code decides. The thresholds live in your repo, so you can move requires_tow from 0.5 to 0.7 in an afternoon without retraining anything, and you can explain the change to a regulator in one sentence. However, what a model score is authorized to do in a real claims system is a decision for the insurer and their compliance team, not for this tutorial.
One safety net the demo doesn’t have: when Clef is unsure or the request fails, server.js falls back to a default minor_cosmetic evaluation. This works in a demo but silently approves a claim during a production outage. Route failed or uncertain evaluations to a person instead.
The Video Layer: Vonage Sessions and Signaling
The video layer in this app is similar to the one I showed in my last article, From Frustrated Chats to Live Video Support With Jev and Vonage. What’s different in this claims app is the payload.
We are still using two types of Vonage Video sessions:
Customer sessions that are unique per customer and are created on demand when a user first loads the app. These come with a publisher token, so they are ready to jump into their respective video sessions and are also used for taking pictures of the damaged vehicle.
The dispatch session is one shared routed session that every adjuster dashboard joins as a subscriber. It carries no video; it’s purely a signaling channel for broadcasting escalation events across the dashboard in real time, until it’s time to connect to a customer.
Send the Escalation Signal From the Server
The escalation fires from /api/escalate/trigger, only after the claimant opts in by tapping Connect to Live Adjuster:
Keep that payload small. We’re sending the image URLs, not image data, because the signal has to fit inside the payload limit, and the dashboard can fetch the images itself. See the Vonage Video signaling guide for payload limits.
On the dashboard side, two signal handlers listen to the dispatch session:
Claim the Call So Only One Adjuster Answers
The claimed signal matters as much as the escalation signal. When one adjuster accepts, /api/escalate/claim broadcasts claimed with the customer ID, and every other dashboard removes that card from the screen to prevent two adjusters joining the same customer session.
Adjuster dashboard showing an escalation card for an automated insurance claim, with Clef's severity assessment and an Accept and Join Video button.
Join the Claimant’s Session With a Publisher Token
When an adjuster clicks Accept and Join Video, the server returns a publisher token for the claimant’s specific session:
The adjuster side then follows the standard sequence: OT.initSession on the claimant’s session ID, connect with the token, subscribe to the claimant’s stream, then publish the adjuster’s own camera. See the joining a session guide for the full sequence.
On the claimant side, the camera they’ve been using for photos moves directly into the live call stage. The page calls publishAudio(true), then session.connect() and session.publish(). A subscriber container appears for the adjuster’s stream. No second camera, no re-permission prompt.
Two token roles are in play throughout the app:
Role
Permissions
Used for
subscriber
Listen only
Adjuster dashboard on the dispatch session
publisher
Publish and subscribe
Both parties inside the claim call
Tokens expire by default 24 hours after they are created. Once expired, you cannot use the token to connect to the session. Read more on token creation and best practices in the Video API Docs.
Putting It All Together
Here’s the complete journey from photo capture to live call:
- Claimant visits the customer page on their phone → server creates a Vonage Video session and returns a publisher token (/api/auth/customer)
Claimant visits the customer page on their phone → server creates a Vonage Video session and returns a publisher token (/api/auth/customer)
- Claimant photographs four corners of the vehicle
Claimant photographs four corners of the vehicle
- Claimant taps Submit → client POSTs four images and the session ID to /api/process-claim
Claimant taps Submit → client POSTs four images and the session ID to /api/process-claim
- Server sends one Clef request with all four images and eight typed questions
Server sends one Clef request with all four images and eight typed questions
- Clef returns eight answers under result.answers
Clef returns eight answers under result.answers
- Server’s decision engine applies thresholds → returns escalate, no_damage, or approved
Server’s decision engine applies thresholds → returns escalate, no_damage, or approved
- If approved or no_damage: claimant sees the result screen, no video session opens
If approved or no_damage: claimant sees the result screen, no video session opens
- If escalate: claimant sees the Severe Damage Detected dialog
If escalate: claimant sees the Severe Damage Detected dialog
- Claimant taps Connect to Live Adjuster → client POSTs to /api/escalate/trigger
Claimant taps Connect to Live Adjuster → client POSTs to /api/escalate/trigger
- Server sends an escalation signal on the dispatch session with the session ID, Clef’s evaluation, and the image URLs
Server sends an escalation signal on the dispatch session with the session ID, Clef’s evaluation, and the image URLs
- Card appears on each adjuster’s dashboard
Card appears on each adjuster’s dashboard
- Adjuster clicks Accept and Join Video → server broadcasts claimed, returns a publisher token for the claimant’s session
Adjuster clicks Accept and Join Video → server broadcasts claimed, returns a publisher token for the claimant’s session
- Both parties are now in the same Vonage Video session
Both parties are now in the same Vonage Video session
Before You Ship This
We cut corners in this demo on purpose. Here they are, so they don’t make it into your production.
- Token route: /api/auth/customer-token hands a publisher token to anyone who sends a session ID. That’s Broken Object Level Authorization (BOLA), number one on the OWASP API Security Top 10. Tie the token to an authenticated adjuster and to the specific claim record.
Token route: /api/auth/customer-token hands a publisher token to anyone who sends a session ID. That’s Broken Object Level Authorization (BOLA), number one on the . Tie the token to an authenticated adjuster and to the specific claim record.
- Uploads: The server writes images to public/uploads and serves them to anyone who guesses the path. Move them to private storage with short-lived signed links and a retention policy.
Uploads: The server writes images to public/uploads and serves them to anyone who guesses the path. Move them to private storage with short-lived signed links and a retention policy.
- State: Incidents live in an in-memory Map. A server restart loses every open claim. Use a database.
State: Incidents live in an in-memory Map. A server restart loses every open claim. Use a database.
- Failure paths: When Clef returns nothing, the server falls back to a default minor_cosmetic evaluation, which silently approves a claim during an outage. The escalate route also defaults severity to total_loss when it has no incident on file, which is the opposite default. Make both fail toward a person, never toward a default outcome.
Failure paths: When Clef returns nothing, the server falls back to a default minor_cosmetic evaluation, which silently approves a claim during an outage. The escalate route also defaults severity to total_loss when it has no incident on file, which is the opposite default. Make both fail toward a person, never toward a default outcome.
- Port visibility: The devcontainer makes port 3000 public. That’s correct for a demo and wrong for a real claim.
Port visibility: The devcontainer makes port 3000 public. That’s correct for a demo and wrong for a real claim.
Where to Take It Next
Verify phone numbers. Use Vonage Verify to confirm the claimant’s number before the claim opens. It ties a claim to a real phone with one additional step.
Record and transcribe the call. An adjuster’s verbal findings during a live inspection belong in the claim file. Add Vonage Video archiving.
Send the claimant a link. Insurers delivered adequate digital status updates only 22% of the time (J.D. Power, 2025 US Claims Digital Experience Study). Close that gap with the Vonage Messages API: send a text with a link to the claimant’s claim page as soon as the claim is received.
Add Quality on Demand for roadside calls. Roadside connections are unreliable. Vonage’s Quality on Demand API lets you request a minimum network quality for the call. This pattern is already in production: Bdeo, an AI insurance technology company, uses the Vonage Video API, Messages API, and Quality on Demand together on live insurance claims (Vonage/Bdeo announcement, October 2026).
For more Video API walkthroughs, explore the Video API Learning Paths and the Vonage Developer YouTube channel.
Wrapping Up
While we’ve covered some neat Video API features, the most exciting part of this article is the decision layer that triggers them. Clef returns typed probabilities, your thresholds are readable numbers in a file you own, and the escalation logic is auditable in a few lines of code. That’s a different kind of reliability than parsing AI-generated prose and hoping the format holds.
The same pattern works anywhere you need to route a human into a process only when needed. Fork the repo, run the sample scenarios, and have a play with it. Let us know what you build!
Frequently Asked Questions About Automated Insurance Claims
How long does an insurance claim take?
It depends on severity, but the clock runs longer than most policyholders expect. Average repair cycle time ran to 15.3 days through the first quarter of 2026 (Source: J.D. Power, "2026 U.S. Auto Claims Satisfaction Study," 2026, https://www.jdpower.com/business/press-releases/2026-u-s-auto-claims-satisfaction-study/). Much of that is queueing behind the first human review. Automating the triage decision removes that queue for the clear cases.
What is first notice of loss?
First notice of loss, or FNOL, is the moment a policyholder reports a loss to their insurer. It's the first record of the claim and the trigger for everything downstream: triage, assignment, inspection, and payment. The app in this tutorial replaces the FNOL step with a guided photo capture and an automatic triage decision.
How do you automate insurance claims intake and processing with a decision model?
You capture structured evidence, send it to a decision model that answers fixed questions with probabilities, and apply your own thresholds in code. In this app, four corner photos go to Cloudflare Clef in one request, Clef returns eight typed answers, and a short server-side engine resolves them to approved, no damage, or escalate to a live adjuster.
What is straight-through processing in insurance?
Straight-through processing is a claim that completes without manual handling. It doesn't mean no human oversight. It means no human touch for claims that don't need it. The pattern in this tutorial is a narrow version of it: auto-approve the clearly minor claims, and route anything with airbags, a tow, or a total loss signal to a person.